Getting started
Getting started just takes a few quick steps.
- Install nemo
$ npm install --save-dev nemo- Use the scaffold feature to add a basic nemo test suite
$ npx -X test
  DONE!

  Next steps:
  1. Make sure you have latest chrome/chromedriver installed (https://sites.google.com/a/chromium.org/chromedriver/getting-started)
     - The binary should be in your PATH
  2. Run nemo! "npx nemo"
  3. Look at nemo.config.js and test/nemo.test.js
  4. Learn more: http://nemo.js.org
- Get the chromedriver if necessary, add a convenience script to package.json, then run nemo!
$ npx nemo

  @firstTest@
    ✓ should load a website (1926ms)

  1 passing (3s)

┌────────────────────────────────────────────────────────────────┬──────┬──────┬───────┐
│ tags                                                           │ pass │ fail │ total │
├────────────────────────────────────────────────────────────────┼──────┼──────┼───────┤
│ profile: base                                                  │ 1    │ 0    │ 1     │
│ reportFile: /07-14-2018/11-11-34/profile!base/nemo-report.html │      │      │       │
│                                                                │      │      │       │
├────────────────────────────────────────────────────────────────┼──────┼──────┼───────┤
│ TOTALS                                                         │ 1    │ 0    │ 1     │
└────────────────────────────────────────────────────────────────┴──────┴──────┴───────┘
Suite structure
tests
Tests are defined in the mochajs describe syntax:
describe('@firstTest@', function () {
  it('should load a website', async function () {
    let nemo = this.nemo;
    await nemo.driver.get(this.nemo.data.baseUrl);
    await nemo.view._waitVisible('#searchForm');
    await nemo.view._find('#searchInput').sendKeys('Nemo.js Selenium');
    await nemo.view._find('#searchButton').click();
  });
});
The nemo instance is injected to the mocha context for it, before, after, beforeEach, afterEach.
The main points of interaction will be with:
-
nemo.driver: an instance of theselenium-webdriverDriver -
nemo.view: nemo's built-in webdriver abstraction:- eases the finding of elements and simplifies the most common interactions with WebElements
- provides facility for grouping locators and building convenience methods around them
-
nemo.data: This is data you provide via your configuration to be used in your tests- you can data-drive your tests and define parallel behavior with
nemo.dataas well
- you can data-drive your tests and define parallel behavior with
reports
The example suite generated from nemo -X uses the mochawesome reporter by default. Nemo generates reports into folders based on <date>/<time>/<tag-based-directory>/nemo-report.html. This allows you to easily drill into reports over time, and see what run configuration generated them (critical for making sense of parallel runs).
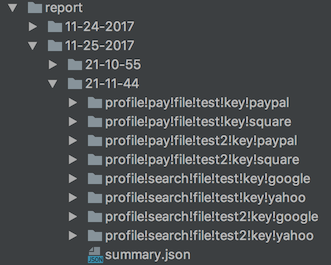
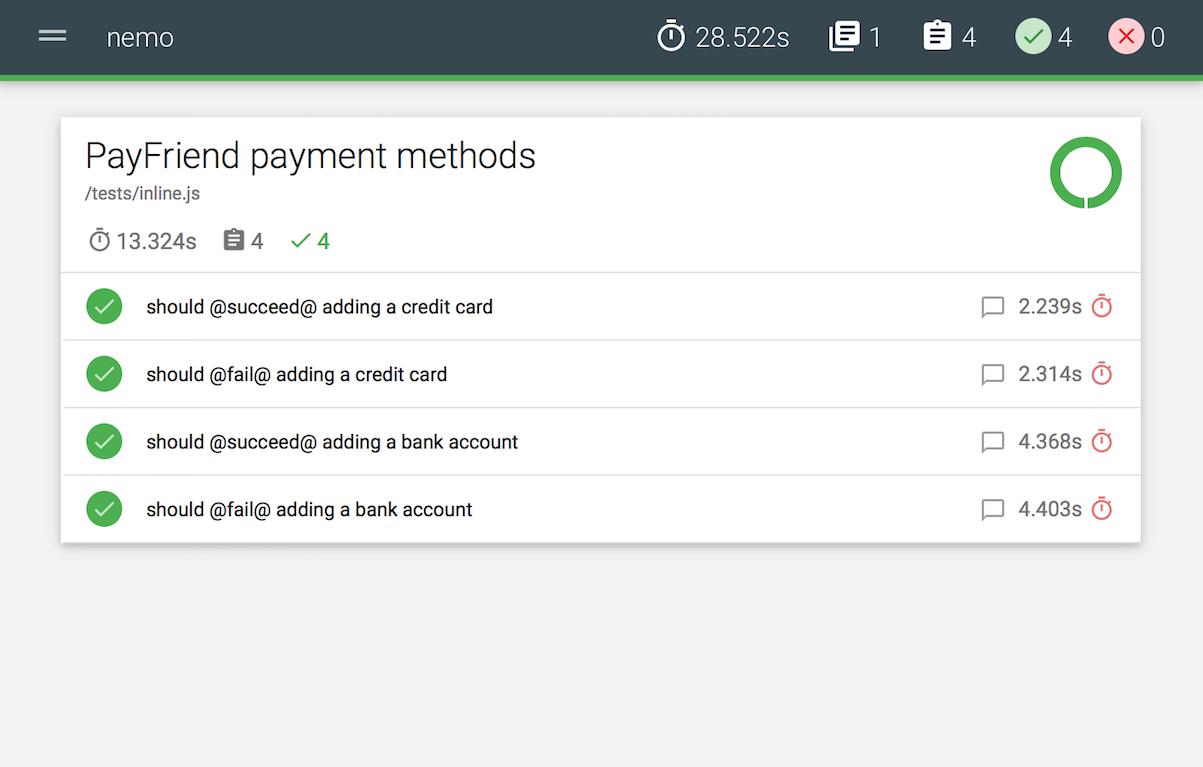
Below is a mochawesome report:
Below is a mochawesome report with screen capture image:
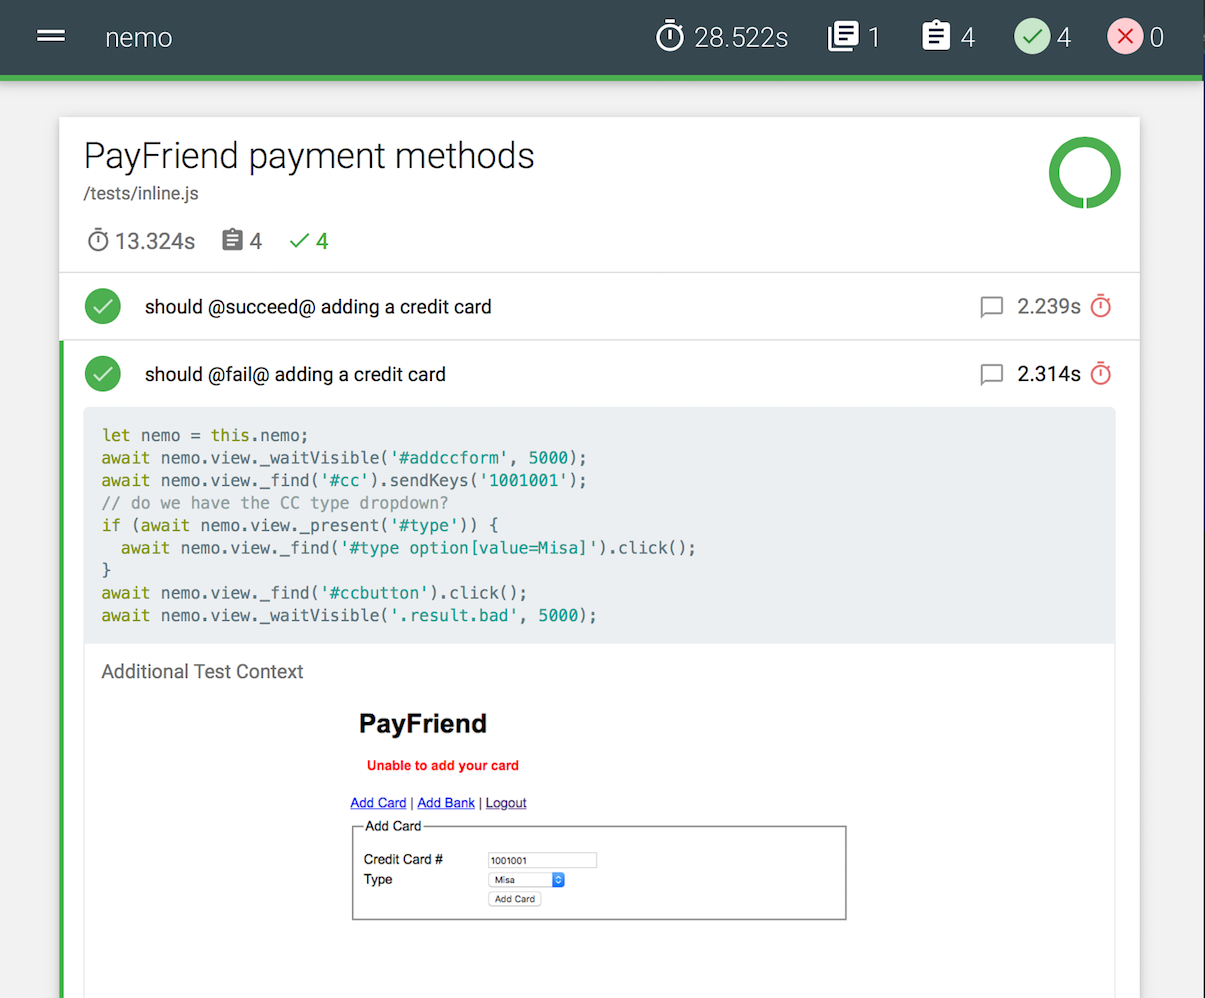
You can take a screen capture any time with nemo.snap() and it will be automatically added to the report.
Configuration
Nemo's default configuration file is nemo.config.js. Example below:
const path = require('path');

module.exports = {
  plugins: {
    view: {
      module: 'nemo-view'
    }
  },
  output: {
    reports: path.resolve('test', 'report')
  },
  profiles: {
    base: {
      tests: path.resolve('test', '*test.js'),
      driver: {
        browser: 'chrome'
      },
      data: {
        baseUrl: 'https://www.google.com'
      },
      mocha: {
        timeout: 180000,
        reporter: 'mochawesome',
        reporterOptions: {
          quiet: true
        }
      }
    }
  }
}
Profiles
A "profile" configuration has all information necessary to run nemo for a particular environment or scenario.
profiles.base in config.json is required, and is the default and parent configuration. All other profiles will inherit from and merge with the base profile.
For example, with the profiles configuration from above:
    "profiles": {
        "base": {
            "data": {
                "baseUrl": "https://www.google.com"
            },
            "tests": "path:./tests/*",
            "mocha": {
                "timeout": 180000,
                "reporter": "mochawesome",
                "reporterOptions": {
                    "quiet": true
                }
            }
        },
        "firefox": {
            "driver": {
                "browser": "firefox"
            }
        }
    }
Running the firefox profile will merge the base profile object with firefox profile object. In this case the only difference is using "firefox" instead of "chrome" as the browser. But you could likewise override any other base profile setting with the firefox profile object.
You would run with the base profile this way:
$ npx nemoAnd with the firefox profile this way:
$ npx nemo -P firefoxYou can also choose to run the two in parallel this way:
$ npx nemo -P base,firefoxHere are all the available profile configuration attributes
| Name | Type | Required | Default | Description |
|---|---|---|---|---|
| driver | Object |
yes | none | Configure browser/server capabilities. Full details |
| tests | Glob |
yes | none |
Glob to select desired test file(s) |
| mocha | Object |
yes | none | mocha options. Full details |
| parallel | String |
no | none | can specify file or data. More details on parallel functionality
|
| driverPerTest | Boolean |
no | false |
by default a driver is created per-suite |
| data | Object |
no | none | pass in a data object for use as nemo.data. Can also be used to data-drive tests in parallel |
| maxConcurrent | Number |
no | none | limit the number of parallel instances nemo will launch |
Output
The output section is where you configure:
- placement of reports
- custom event listeners
- an InfluxDB server
| Name | Type | Required | Default | Description |
|---|---|---|---|---|
| reports | String |
yes | none |
path:reports will put reports into a "reports" directory under your suite base directory |
| listeners | String |
no | none |
require:./config/listeners will require a module names listeners.js under the suite config directory. Export individual listeners from listeners.js. Full details
|
| storage | Object |
no | none | provide InfluxDB server/database/credentials to have test results pushed to that database. Full details |
CLI arguments
To view all CLI arguments, use nemo --help
$ npx nemo --help
Usage: _nemo [options]

Options:
  -V, --version                  output the version number
  -B, --base-directory     parent directory for config/ and spec/ (or other test file) directories. relative to cwd
  -C, --config-file        config file. can be JS or JSON
  -P, --profile [profile]        which profile(s) to run, out of the configuration
  -G, --grep            only run tests matching
  -F, --file                     run parallel by file
  -D, --data                     run parallel by data
  -S, --server                   run the nemo web server
  -L, --logging                  info level logging (errors log by default)
  -X, --scaffold           inject an example nemo suite under
  -Z, --scaffold-complex   inject a full-featured (complex) example nemo suite under
  -U, --allow-unknown-args       allow command line arguments not specified by Nemo
  -E, --exit                     force shutdown of the event loop after test run: nemo will call process.exit
  --debug-brk                    enable node's debugger breaking on the first line
  --inspect                      activate devtools in chrome
  --no-timeouts                  remove timeouts in debug/inspect use case
  -h, --help                     output usage information
Plugins
Plugins help you add custom functionality to your nemo tests. Nemo comes by default with nemo-view. You can read further about plugins here.
More information
Find screencast tutorials on our Vimeo channel. Also, follow @nemojs_news on twitter!